Lesson 3.4
ABC in the bigger picture
Position, previous fourth-wave target zone, alternation and the path to a setup
In short: A Zigzag alone tells you nothing. Only its **position within the larger
picture** turns it into information — the same pattern is an opportunity in Wave 2 and
a trap in Wave B.
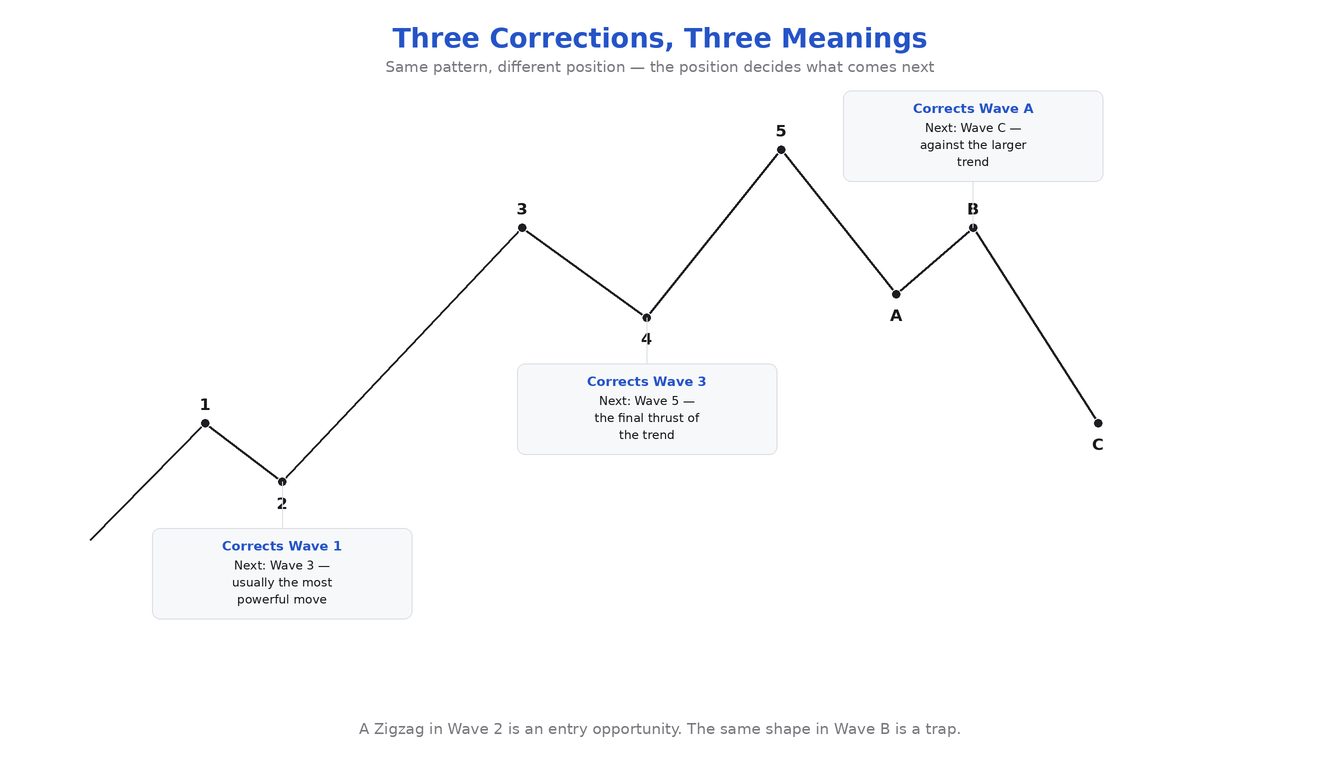
The three places where corrections occur
| Position | What the correction does there | What comes next |
|---|---|---|
| Wave 2 | corrects Wave 1 | Wave 3 — usually the most powerful |
| Wave 4 | corrects Wave 3 | Wave 5 — the final thrust of the |
| Wave B | corrects Wave A within a larger | Wave C — against the larger trend |
Actionary and Reactionary — the organizing principle
- Actionary (in the direction of the next larger degree): 1, 3, 5, A, C, E, W, Y, Z
- Reactionary (against the next larger degree): 2, 4, B, D, X
All reactionary waves develop correctively. Most actionary waves develop as motive waves — but not all. Despite having an actionary function, the following are constructed correctively:
- Waves 1, 3, and 5 of an Ending Diagonal (Module 2.3)
- Wave A in a Flat correction (Lesson 3.3)
- Waves A, C, and E in a Triangle
- Waves W and Y in a Double Zigzag and a Double Three
- Wave Z in a Triple Zigzag and a Triple Three
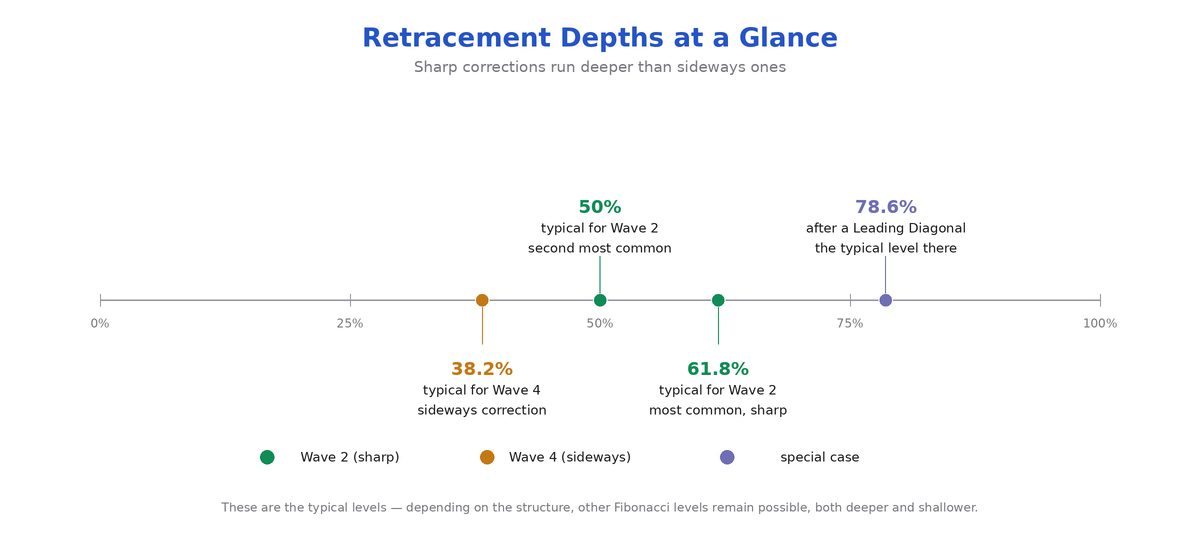
Retracement Depths: An Overview of the Numbers
- Sharp corrections tend to retrace 61.8% or 50% — especially in a Wave 2 position.
- Sideways corrections tend to retrace 38.2% — especially in a Wave 4 position.
- A Leading Diagonal in a Wave 1 position is typically followed by a Zigzag retracement of 78.6%.
- FX: Wave 2 normally retraces 61.8% or more of Wave 1; otherwise, 50% is the next most common level.
- FX: The most typical retracement for Wave 4 is 38.2% of Wave 3.
- FX: If the correction begins with a complex sideways pattern, the damage is usually limited to 38.2%, exceptionally to 50% — even for a second wave.
- A retracement that does not exceed 38.2% suggests pent-up strength. The same applies to an unusually long consolidation.
Alternation — a preview you need right away
For the FX market, the restriction from Module 2.1 applies: Alternation is more reliable in terms of the extent of the correction than its form. So, if Wave 2 has retraced 61.8% or more, expect Wave 4 to be closer to 38.2%. In addition: Second waves are more often simple in construction, fourth waves more often complex.
Orthodox Top and Orthodox Bottom
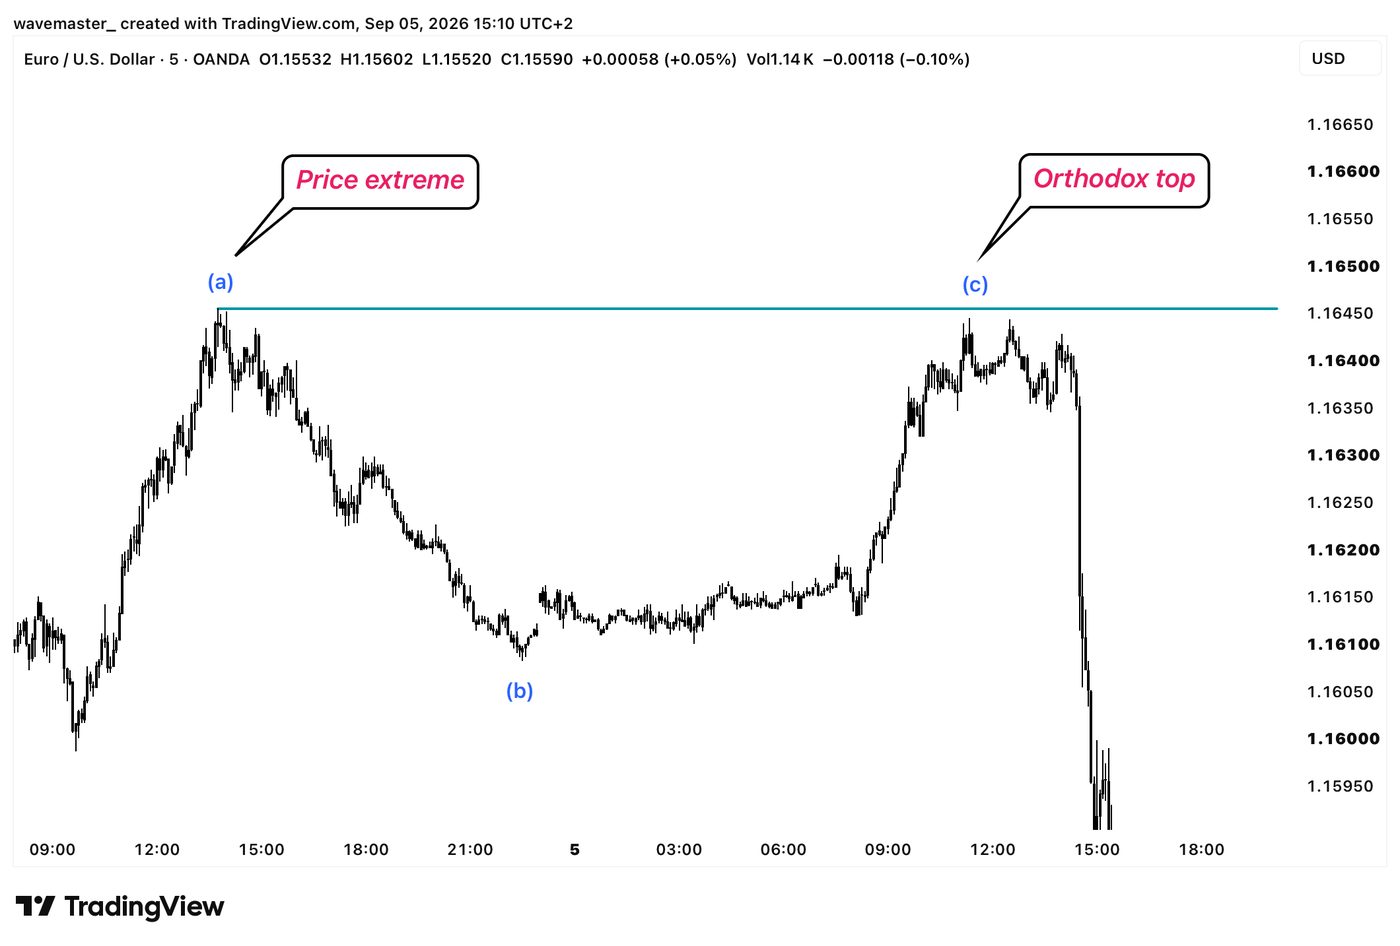
The end of a pattern is not always identical to the price extreme. Where the two diverge, the pattern's endpoint is called the orthodox top or bottom. Because the length and duration of a wave are measured from orthodox endpoints, any incorrect labeling will also shift all derived targets. From Module 4 onwards — at the latest with the Expanded Flat — this becomes a daily question.
The Trap: A complete ABC is not always a complete correction
This is the very core of wave analysis: not finding the one correct count, but maintaining the most probable count with a defined invalidation condition.
From Pattern to Setup
1. Determine the larger trend. Which wave of the bigger picture are you in? 2. Determine the correction's position. Wave 2, Wave 4, or Wave B? Only the first two are
3. Identify the pattern. Count Wave A: five → Zigzag family, three → Flat family. Check the depth
4. Formulate a target zone. Area of the preceding fourth wave of one lesser degree, plus
5. Set the invalidation level. For a Zigzag, the start of Wave A — and always the rules of the
6. Wait for confirmation. The completion of Wave C as a five-wave structure.
Knowledge check
1. Which waves are reactionary?
2. Where is the most important target zone for a correction?
3. Wave 2 was a deep, sharp Zigzag. What do you expect for Wave 4?
4. A Zigzag is in a Wave B position. What does that mean?